Learn to create a practical and stylish zipper pouch with this easy-to-follow guide․ Perfect for beginners, this DIY project covers basic sewing skills and zipper techniques․
Materials Needed for a Zipper Pouch
Gather fabric for the exterior and lining, a zipper, thread, and notions like pins and scissors․ Optional interfacing adds stability to your pouch․
Fabric Selection and Requirements
Fabric selection is crucial for a zipper pouch, as it determines both the appearance and durability․ Choose fabrics that are lightweight yet sturdy, such as cotton, polyester blends, or quilting fabrics, which offer vibrant patterns and textures․ For a more structured pouch, consider using canvas or heavier-weight fabrics․ When selecting fabric, ensure it aligns with the intended use of the pouch—whether for cosmetics, electronics, or everyday items․ Measure and cut fabric pieces accurately, typically two main pieces for the exterior and two for the lining․ Pre-wash fabrics to avoid shrinkage and press them before cutting for a professional finish․ Always use high-quality materials to ensure a polished and long-lasting result․
Zipper Types and Sizes
Selecting the right zipper is essential for a functional and professional-looking pouch․ Common zipper types include nylon coil, metal, and plastic molded zippers, each offering durability and ease of use․ For most pouches, a 9-inch zipper is ideal, but sizes can vary depending on the project․ Choose a zipper that matches your fabric weight—delicate fabrics pair well with lightweight zippers, while heavier fabrics require sturdier options․ Measure the zipper tape to ensure it aligns with your fabric dimensions․ Pre-cut zippers are convenient, but separating zippers offer flexibility for custom lengths․ Always consider the pouch’s intended use when selecting zipper type and size for optimal performance and aesthetics․
Thread and Notions
Choosing the right thread and notions ensures a polished finish for your zipper pouch․ Use a high-quality, all-purpose thread that matches your fabric color to blend seamlessly․ For added strength, consider using a heavy-duty or topstitching thread, especially for stress points like zipper edges․ Essential notions include a zipper foot for your sewing machine, which helps guide the zipper evenly, and hand-sewing needles for closing lining openings․ Interfacing or stabilizer can add structure, especially for lightweight fabrics․ Optional notions like decorative rivets or labels can enhance the pouch’s appearance․ Always have scissors, pins, and a seam ripper handy for precise cutting and adjustments․ These small details contribute to a professional and durable finished product;

Tools Required for Sewing a Zipper Pouch
Gather essential tools like a sewing machine, scissors, pins, measuring tape, and a seam ripper․ A zipper foot and cutting mat are also beneficial for accuracy․
Sewing Machine and Basic Sewing Tools
A reliable sewing machine is essential for stitching fabric and zippers together․ Use a standard presser foot for straight seams and consider a zipper foot for precise alignment․ Basic tools include sharp scissors, pins, and a seam ripper for corrections․ A measuring tape or ruler ensures accurate fabric cuts․ Iron and ironing board are vital for pressing seams flat, enhancing the pouch’s professional finish․ Optional accessories like a walking foot can help manage thick fabrics․ Gather these tools to streamline the sewing process and achieve clean, durable stitches․ Proper equipment setup is key to successfully completing the zipper pouch project efficiently․
Measuring and Cutting Tools
Accurate measuring and cutting are crucial for a professional-looking zipper pouch․ Use a rotary cutter and mat for precise fabric cuts, ensuring straight edges and consistent sizes․ A clear acrylic ruler helps measure fabric accurately, while scissors or shears are handy for smaller cuts․ Optional tools like a quilting ruler or cutting board can enhance precision․ Always double-check measurements to avoid errors․ Properly cut fabric ensures seams align correctly, making the sewing process smoother․ Invest in sharp tools for clean cuts, as dull blades can fray fabric․ Organize your tools to streamline the cutting process, ensuring efficiency and accuracy in creating your zipper pouch․
Optional Tools for Advanced Features
Take your zipper pouch to the next level with these advanced tools․ A serger or overlock machine can finish seams professionally, preventing fraying․ Interfacing or stabilizer adds structure, especially for boxed corners or standing pouches․ A walking foot or Teflon foot on your sewing machine helps manage thick fabrics or multiple layers․ For quilting or decorative stitching, a free-motion foot allows creativity․ Add embellishments like rivets or snaps with specialized tools․ Use a zipper foot for precise zipper alignment and smooth sewing․ These tools enhance functionality and aesthetics, offering a polished finish for your project; They are ideal for experienced sewists looking to add unique touches or improve durability․

A Step-by-Step Guide to Sewing a Zipper Pouch
Follow this detailed guide to create a custom zipper pouch․ Each step is designed to be clear and accessible, ensuring a successful and professional-looking result for sewists of all skill levels․
Step 1: Cutting the Fabric
Begin by measuring and cutting your fabric according to the desired size of your zipper pouch․ Ensure the fabric is properly aligned on the grain for stability․ Cut two main pieces for the exterior and two for the lining, making sure they are identical in size․ If using a pattern, follow the template carefully․ For a standard pouch, cut rectangles with dimensions slightly larger than the zipper length․ Add seam allowances to each edge, typically 1/4 inch․ Use sharp scissors or a rotary cutter and mat for precise cuts․ Smooth out wrinkles before cutting to ensure accuracy․ This step sets the foundation for a professional finish, so precision is key․
Step 2: Sewing the Zipper
Place the zipper along one edge of the fabric, aligning the zipper tape with the raw edge of the fabric․ Use a zipper foot on your sewing machine for precise stitching․ Sew the zipper to the exterior fabric, starting at the bottom and working up, backstitching at the beginning and end․ Repeat this process for the lining fabric on the opposite side of the zipper, ensuring it is evenly aligned․ Once both sides are sewn, carefully trim any excess zipper tape․ Fold the fabric away from the zipper and press the seam allowances open for a flat finish․ This step is crucial for a professional-looking pouch and ensures the zipper functions smoothly․
Step 3: Sewing the Sides and Bottom Seams
With the zipper securely attached, place the exterior and lining fabrics right sides together, ensuring the zipper is centered․ Pin the sides and bottom edges to maintain alignment․ Sew along the sides and bottom using a 1/4-inch seam allowance, backstitching at the start and end for durability․ Make sure to keep the zipper tape flat and avoid sewing over it․ If desired, use a walking foot or Teflon foot for smooth sewing․ After sewing, trim any excess fabric at the corners to reduce bulk․ Press the seams open with an iron to ensure a crisp fold when turning the pouch right side out in the next step․
Step 4: Adding a Lining
Place the exterior fabric and lining right sides together, ensuring the zipper is centered․ Pin the edges carefully to align the fabric․ Sew the sides and bottom seams with a 1/4-inch allowance, leaving a small opening for turning․ Backstitch at the beginning and end for strength․ Use a walking foot or Teflon foot if needed for smooth sewing․ Trim excess fabric at the corners to reduce bulk․ Press the seams open with an iron for a crisp fold․ This step ensures the lining is securely attached and prepares the pouch for turning right side out in the next step․
Step 5: Creating Boxed Corners
To create boxed corners, measure and mark a 1 1/2-inch square at each bottom corner of the pouch․ Cut out the square, creating a notch on both the exterior and lining fabrics․ This notch will allow the pouch to form a flat bottom when sewn․ Place the marked corners right sides together and sew along the edge of the notch, ensuring a straight line․ Repeat for all corners․ Trim excess fabric close to the stitching to reduce bulk․ Press the seams open with an iron for a crisp fold․ This step adds structure to the pouch, giving it a professional, boxy shape that stands upright; Properly formed corners enhance the functionality and appearance of the finished pouch․
Step 6: Turning the Pouch Right Side Out
Carefully pull the pouch right side out through the opening in the lining․ Use a blunt object like a chopstick or pencil to help push out the corners for a crisp shape․ Tuck the raw edges of the lining opening inward and press with an iron to create a sharp fold․ Hand-sew or machine-sew the opening closed using a small seam allowance, ensuring stitches are invisible․ This step is crucial for achieving a professional finish․ Once completed, the pouch will have a clean exterior and fully enclosed seams․ Press the entire pouch with an iron to flatten the seams and give it a polished look․ Your pouch is now starting to take its final form with all edges neatly finished․
Step 7: Topstitching for a Finished Look
Topstitching adds a professional finish to your zipper pouch․ Thread your sewing machine with contrasting thread for visibility․ Sew straight lines close to the edges of the pouch, ensuring consistent spacing․ Start at the top edge, backstitch at the beginning, and sew along the zipper and sides․ Repeat on the opposite side for symmetry․ This step reinforces the seams and enhances the pouch’s appearance․ Use a walking foot if needed for smooth stitching․ Once complete, your pouch will have a crisp, polished look․ Backstitch at the end to secure the stitches; This final touch elevates your handmade pouch to a professional level, making it both functional and visually appealing․
Finishing Touches
Add embellishments like bows or labels for a personal touch․ Inspect seams, trim excess threads, and ensure all edges are secure for a polished, professional appearance․
Adding Embellishments
Enhance your zipper pouch with creative embellishments like fabric appliques, embroidery, or decorative stitching․ These details add personality and make your pouch unique․
Consider adding a small bow or ribbon at the zipper pull for a charming touch․ You can also use iron-on patches or personalized labels for a bespoke feel․
For a more intricate look, try adding quilted patterns or textured elements․ Ensure embellishments are securely attached using fabric glue or stitching for durability․
Keep embellishments minimal to maintain functionality․ Choose designs that complement the fabric and overall aesthetic of your pouch for a cohesive finish․
Final Tips for a Professional Finish
To achieve a polished look, ensure all seams are pressed thoroughly using an iron․ This step helps the pouch lie flat and maintains a crisp appearance․
Topstitching along the edges adds a professional touch and reinforces the seams․ Use a contrasting thread color for a decorative effect or match the fabric for subtlety․
Trim excess thread and ensure the zipper is aligned properly․ For a clean interior, hand-sew the lining opening with invisible stitches or use a small seam allowance․
Inspect the pouch for any imperfections and address them before finalizing․ Adding a small label or signature can personalize your creation, giving it a professional flair․
Using and Caring for Your Zipper Pouch
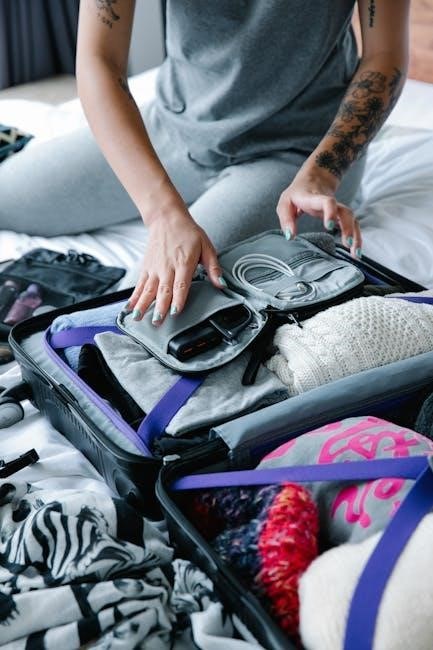
Your handmade zipper pouch is versatile for storing small items like makeup, electronics, or travel essentials․ To maintain its quality, avoid machine washing; instead, spot clean with a damp cloth and mild soap․ Allow it to air dry away from direct sunlight to prevent fading or shrinkage․
Store the pouch in a cool, dry place when not in use․ For longevity, avoid overstuffing, as this can strain the seams or zipper․ Regularly inspect the zipper and lubricate it with a fabric-safe product if it becomes stiff․ With proper care, your zipper pouch will remain durable and functional for years․